

How to Address a Package or Box for Shipping (USPS, UPS, FedEx)
Every package needs two addresses: where it’s going (the destination) and where it came from (the return address). The format is the same whether you hand-write directly on the box or print a label. If you’ve ever addressed an envelope, you already know the layout.
Address format
Each address gets its own block of text with three lines:
- Full name of the person
- Street address (include apartment or suite number)
- City, State, and ZIP code
Write in capital letters. Skip commas and periods. Include the ZIP+4 code if you have it — it helps the carrier sort faster.
If the apartment or suite number doesn’t fit on the street line, put it on its own line above the city and state. USPS publishes standard abbreviations for business and unit designations if you need to save space.
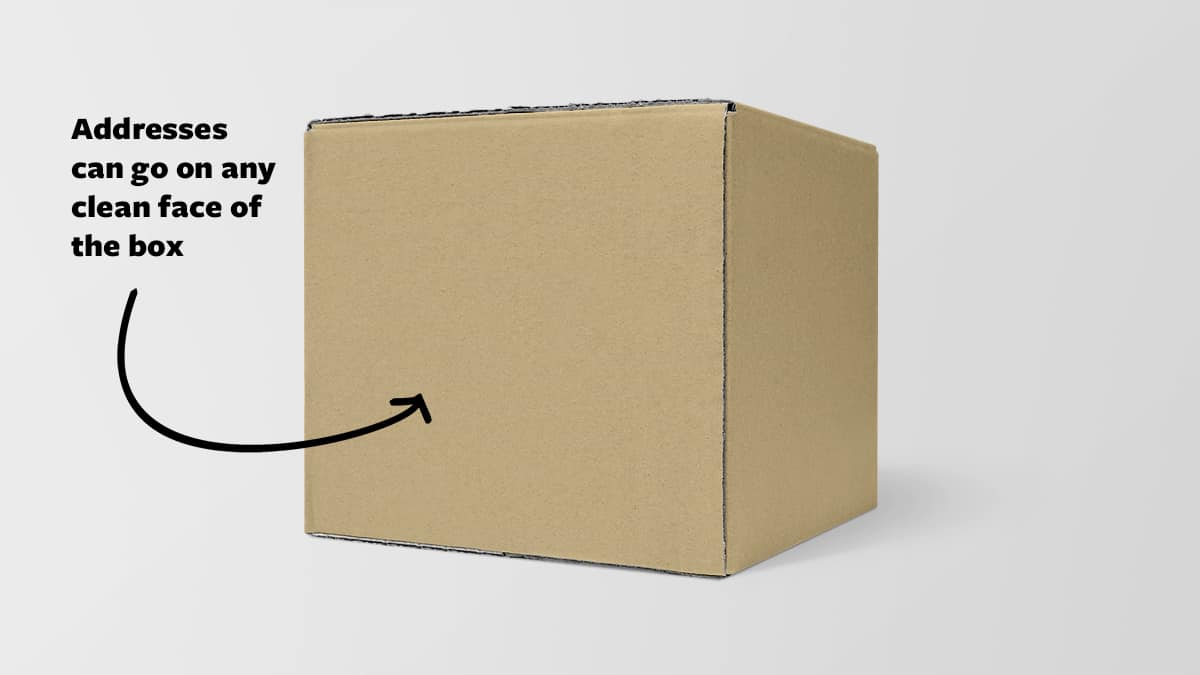
Hand-writing the address on a box (USPS)
You can write the address directly on a shipping box. Find a clean, flat face with enough room for both addresses.
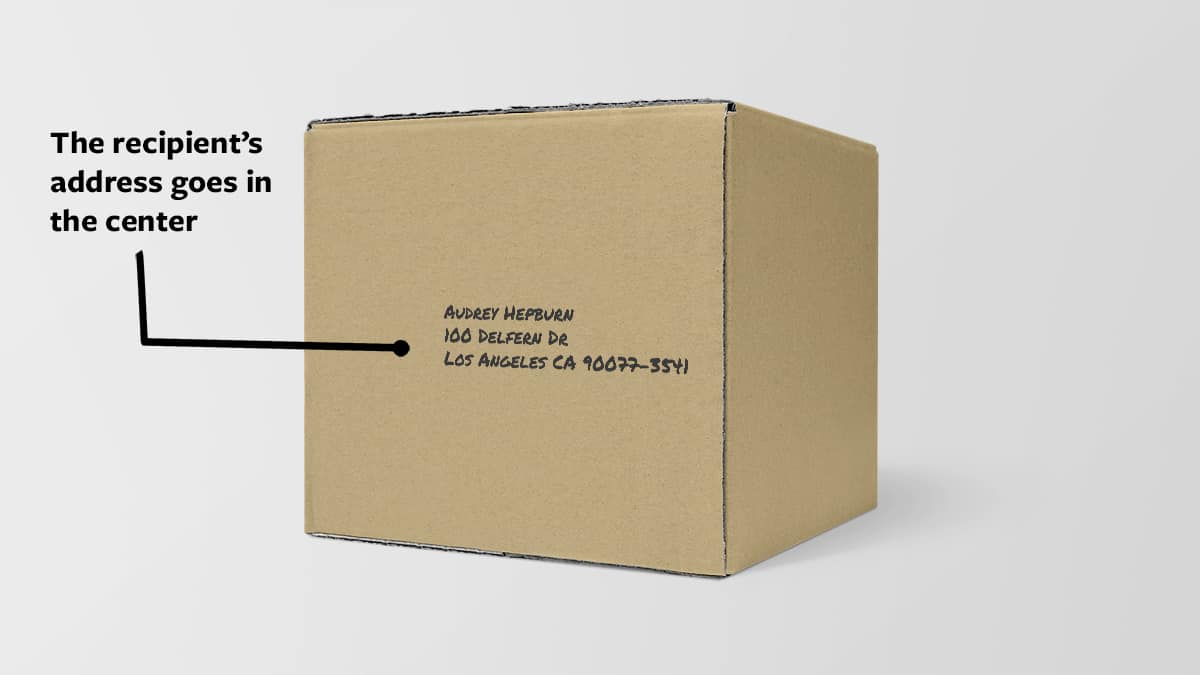
Write the destination address in the center-bottom area of the box face. Use a dark pen or permanent marker — it needs to survive handling and weather.
Write your return address in the upper-left corner of the same face.
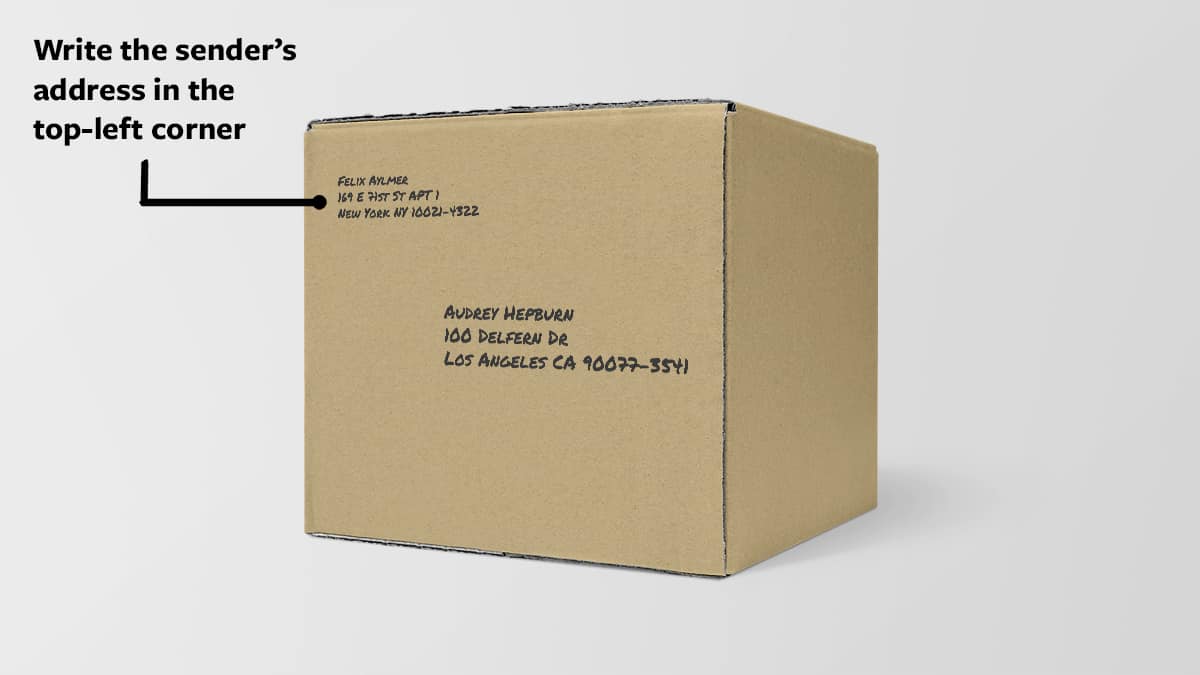
That’s it. Both addresses on the same side, destination in the center, return in the upper left. This is the standard layout that USPS, UPS, and FedEx all recognize.
Printing a shipping label
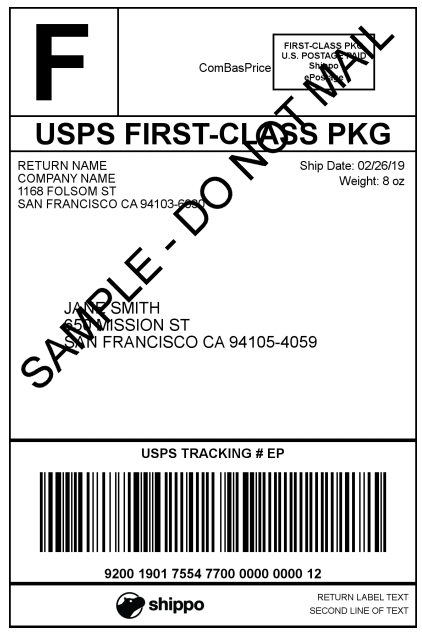
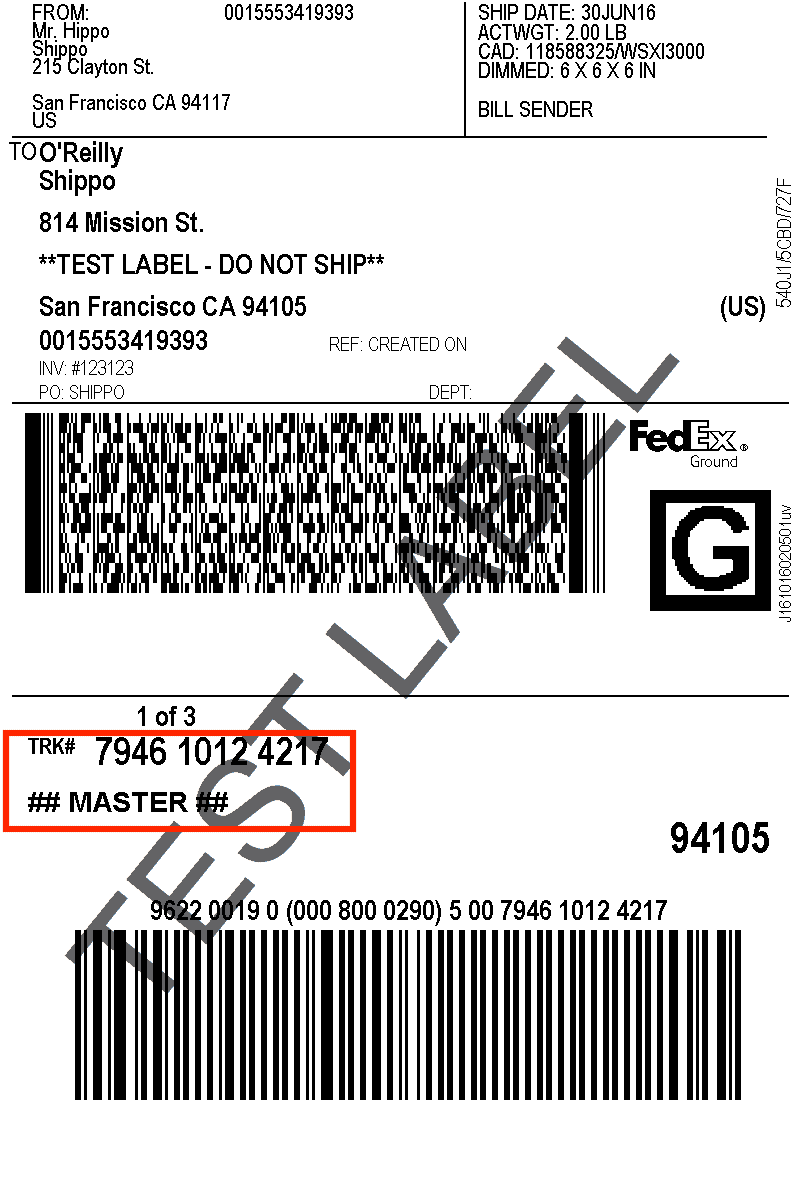
Printed labels are faster and eliminate handwriting legibility issues. They also include the postage, tracking number, and barcode — everything the carrier needs in one sticker.
You can print labels through:
- USPS Click-N-Ship — buy USPS labels directly from the postal service
- Stamps.com — print USPS and UPS labels at discounted commercial rates
- Shippo or ShippingEasy — multi-carrier label printing with rate comparison
- Carrier websites — UPS, FedEx, and DHL each let you create labels through their online accounts
Print the label on any home printer and attach it with clear shipping tape. If you ship regularly, a dedicated label printer with self-adhesive labels saves time.
Once the label is attached, you can drop off the package or schedule a free USPS pickup from home.
You can also skip the label entirely by bringing your package to a post office — either wait in line or use a self-service kiosk (Automated Postal Center) to weigh, measure, pay, and print a label on the spot.
UPS, FedEx, and DHL
Private carriers rely on printed labels rather than hand-written addresses. If you bring an unlabeled box to a UPS Store or FedEx location, you’ll fill out a waybill form — the employee types the information into their system and prints a label for you.
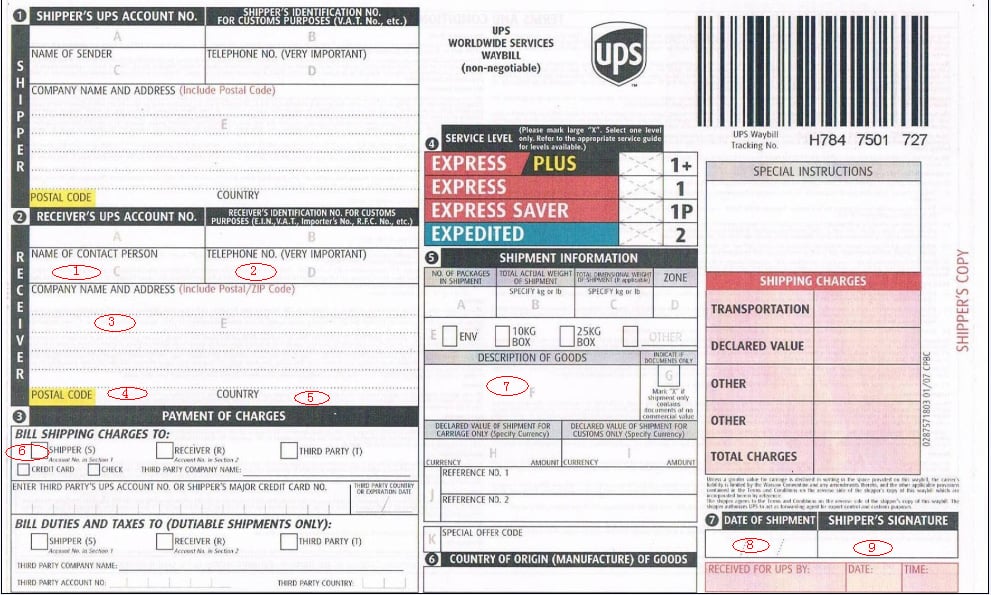
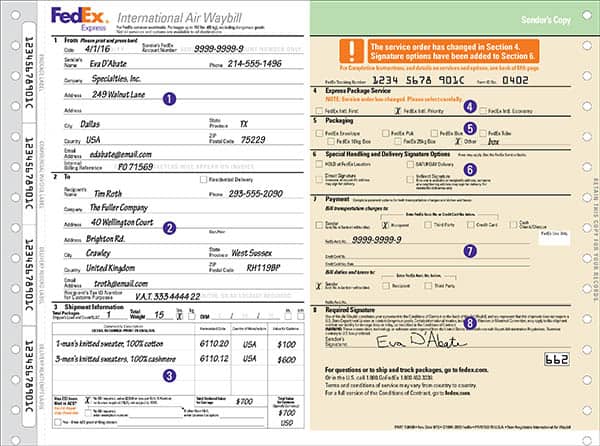
To skip the waybill step, create labels at home through the carrier’s website or through a shipping platform. You’ll get better pricing on postage online than at the counter.
Want to compare prices across carriers before you print? Our shipping calculator shows rates from USPS, UPS, FedEx, and DHL side by side.
Using postage stamps on a package
You can put stamps on a package instead of printing a label, but you’ll need to calculate the exact postage yourself and count out the right number of stamps. This only makes sense if you have unused stamps to use up — otherwise print a label.
Frequently asked questions
Can you write the address directly on a box? Yes. Write the destination address in the center of one face and your return address in the upper-left corner. Use a dark permanent marker. All major carriers accept hand-addressed boxes.
Where does the return address go on a package? Upper-left corner of the same face as the destination address — just like an envelope.
Do I need to print a label, or can I hand-write the address? Either works for USPS. UPS and FedEx prefer printed labels, but their stores will create one for you if you bring in a hand-addressed package. Printed labels are faster, include tracking automatically, and let you buy postage at discounted commercial rates through platforms like Stamps.com or Shippo — often 50–88% cheaper than counter prices.
What if the address is wrong? If the package has already shipped, contact the carrier. USPS offers Package Intercept to redirect or return a package. UPS and FedEx allow address corrections through their tracking systems, sometimes for a fee.